Body
A Little DIY Never Hurts! Try This DIY Bath Soap Recipe For Yourself!
Being a cheapskate isn’t always a bad thing. Sometimes, it means we’re enjoying our little craft time alone, and that...
By: Cherelle Lim / July 26, 2021
Being a cheapskate isn’t always a bad thing. Sometimes, it means we’re enjoying our little craft time alone, and that includes DIY our own cosmetics at home—from body scrubs, to face masks, there are hundreds of different beauty products we can create using only a few ingredients, without having to splurge a lot of money.
Of course you’ll probably think, who on earth would want to make their own body soap when you can just buy them at the store? But that’s the best part of it—we get to create our own body soaps, with our own scents of choice. Also, it’s called ‘’craft hobby’’, we get to have fun at the same time, too.
So, now is the time to channel your inner DIY queen/king, as we at Beauty Insider teach you how to get a little creative! DIY projects are a great way to unleash your creativity and here’s one that you can use in the shower. Who’s up for a challenge? Because we are going to be making our very own DIY bath soap!
Contents
Why DIY Your Own Bath Soap?

Why? This might be a trick question here, but the easiest answer is because why not! It’s for fun! Besides, picking up a new skill every two weeks when you’re bored is normal… hehe…right? Anyway, the main point is that it’s a fun project that you can do with your friends and family! It’s also something you can use right away after you’re done, so it won’t just be sitting on your shelf for years. Well, unless you’re the type to display bath soaps and not use them. But, other than that, it can also be the start of someone’s small business! There are many small and local businesses in Singapore that sell a variety of products. From earrings, press-on nails and even bath soaps! So, this might be your new venture! But, you’ll never know if you don’t try!
The Ingredients

Now, first up, you are going to need the ingredients to make your own DIY bath soap. Just like baking and cooking, soap making requires the same attention to detail, and the right ingredients! There are also a ton of different DIY bath soap recipes on the internet. So, it is pretty easy to find one on Youtube to follow! Once you get the hang of the basics, you can create your own unique DIY bath soap recipes! But for now, here’s a natural recipe for ya!
Since you can create almost anything with bath soaps, here are a few essentials you might need:
Lye
First! Before you go all giddy, you need to know the most important ingredients for making your own body soap. You will need a Lye. So, what’s a Lye? Lye—better known as Sodium Hydroxide—is caustic and should be kept away from any toddler, (if you have one at home). When mixed with water, Lye can turn into dangerous elements which are harmful to your eyes, nose and throat. If it touches your skin, you’ll feel the burning sensation all over. Therefore, make sure to wear protective gloves and eye protection.
When heating up lye, the fumes produced may also cause a slight choking sensation, so you might want to put on a mask as well. Once added, stir immediately and DO NOT allow it to clump up at the bottom as it could cause an explosion. But rest assured, although lye is dangerous to handle before its reaction, it becomes harmless after reacting with the oils in your soap. Thus, no lye will be present in your finished product.
Basic Soap Base
Okay but tbh, you don’t really have to go all out and purchase those hazardous stuff. For the sake of your safety, you can opt for a safer option which is the basic soap base. This soap base is also pretty damn easy to use. Go ahead and google them online. They’re available at any DIY shops near you. And in terms of price, they’re affordable, too.
Once you get them, simply melt them on the stove, and then mix them with some additional ingredients of your choice. Any extract that contributes to skin benefits such as cocoa butter lotion, flower petals and essential oils are welcomed. But don’t worry, every basic soap base you purchase will come in with a handy step-by-step process. They will walk you through the DIY process, just simply follow the rules and you’ll be fine.
Herbs
For a natural and organic DIY bath soap, make sure to gather up your herbs. But, you don’t want raw and floppy herbs, you want them dried! Herbs such as lavender and chamomile are extremely popular when it comes to making soaps. So, you can choose any herb that suits your liking! Just make sure you get a good amount of them so you don’t run out halfway!
Colours
Next up, you might want to consider what colour you want your bath soap to be! Is it going to be a sleek grey, bright orange, or every colour of the rainbow! It is also super easy to create colours naturally. If you want brown, mix some cocoa powder. If you want purple or blue, you can get your hands on some butterfly pea flowers! For yellow, use turmeric, and beetroot for orange! Try to stay away from food colouring as they don’t tend to hold up in soaps.
Essential Oils
For the scent of your DIY bath soap, you can definitely use essential oils derived from plants! But, you can also reach for artificially produced essential oils or organically from flowers, seeds and roots. It is also important that you note how much of the essential oils you can actually use.
Flare
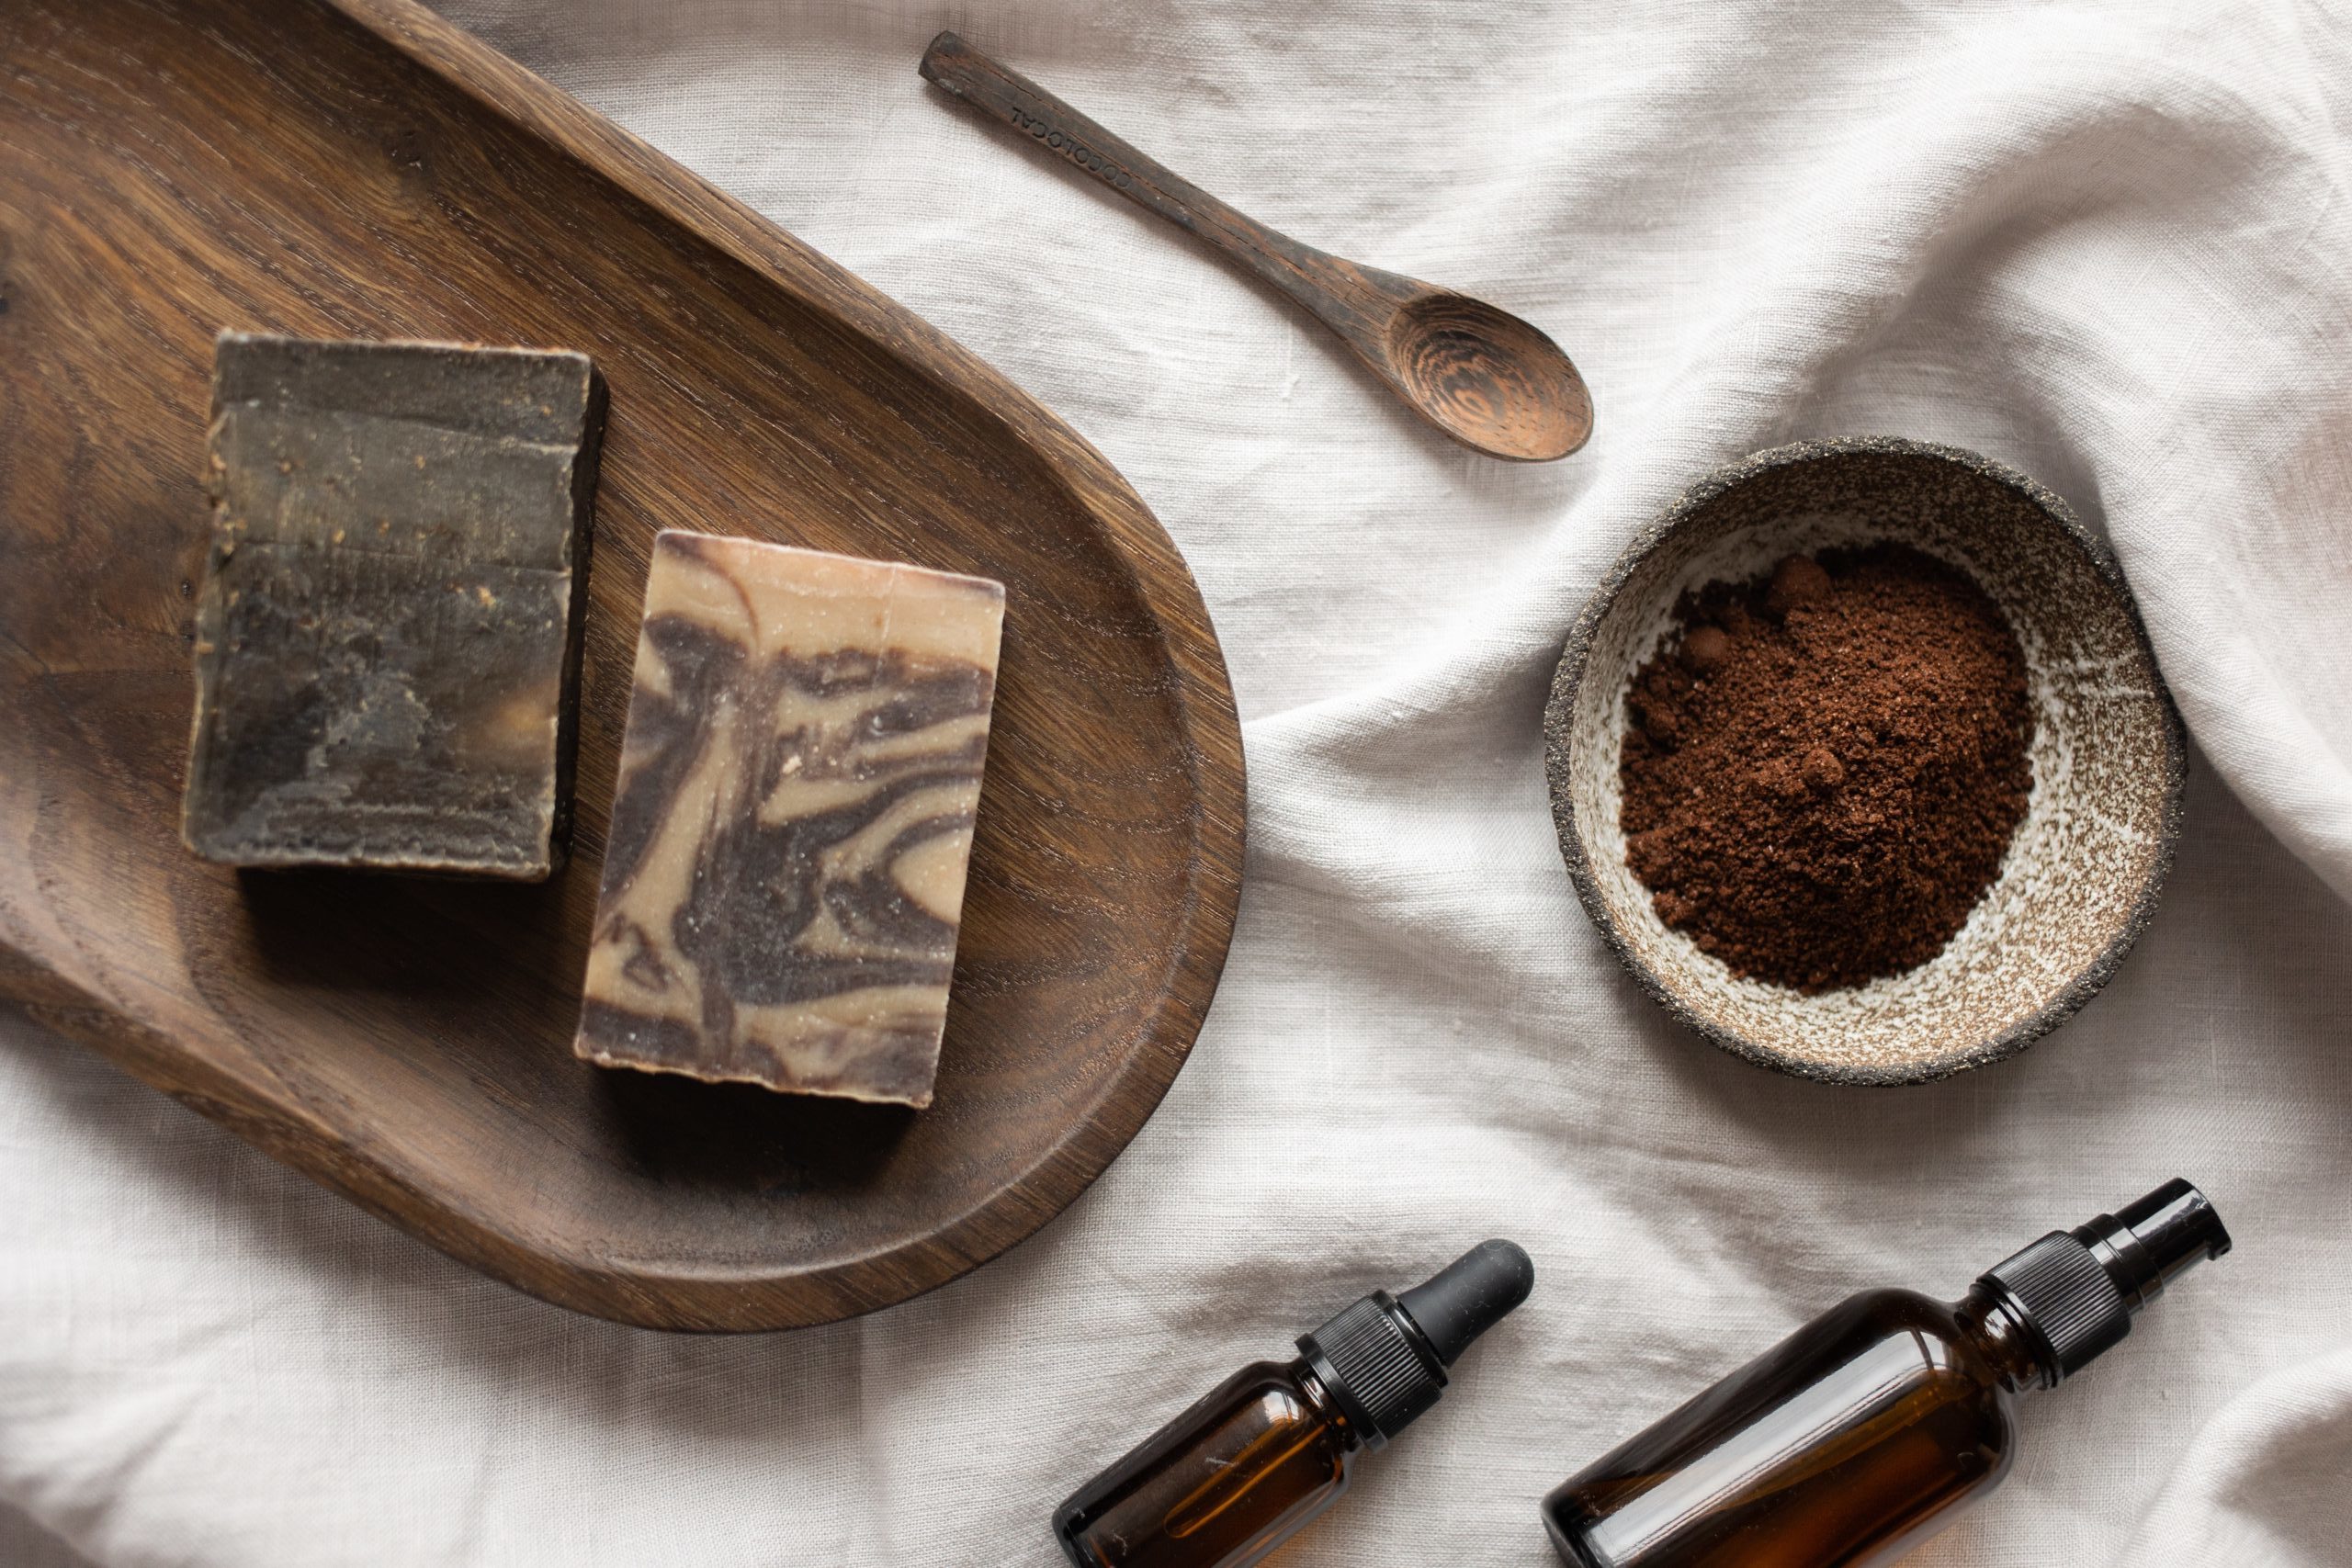
Lastly, you can also add more ingredients to give your own DIY bar soap a little flare! Whether it is to change the texture of your soap or just something you wish to add in, you do you! Maybe you want an oatmeal-based soap or something that smells like genuine coffee! Whatever it is, you can give it a little personal touch, such as adding flower petals into your DIY bar soap.
The Tools

For the tools, you need to get your hands on equipment that you will never use for cooking. It is way safer to have separate tools and materials for your DIY bath soap making. So, you need mixing bowls, either glass, enamel or stainless steel. Avoid using plastic as it could melt and stay away from aluminium and copper bowls, please. Get silicone or styrene plastic spoons as well as soap moulds. If you can’t find any specific soap moulds, you can always get silicone baking pans/moulds. Get a quart canning jar, pint, stainless steel thermometer, newspapers and an old towel to keep away from the mess!
Double check and see if your home is equipped with these tools, if not, go buy them. These are essentials in creating your DIY body soap.
- 1 pound of Soap Base
- Additional ingredients of your choice (Plants, flower petals, lemon / lime juice, honey, essentials oil, etc). The choices are endless.
- Microwave safe-bowl
- A mixer
- Pots or pans
- Ice silicone molds
- Spatula and spoons
1-2-3 Step!
This recipe is taken from DIYNatural.
The prep time for this recipe is 15 minutes and takes a total of 1 day and 1 hour to complete.
Ingredients
- ⅔ cup unrefined coconut oil
- ⅔ cup olive oil
- ⅔ cup almond oil
- ¼ cup lye (100% sodium hydroxide)
- ¾ cup cool water – use distilled or purified
Step 1
Prep your workspace by covering it with newspapers or old towels. Gear up with your gloves and protective wear. Pour your measured amount of water into the quart canning jar and add the exact amount of lye into the jar. Stir as you pour and continue stirring until the water is clear. Stand back to avoid the fumes and once clear, you can set it aside.
Step 2
With the pint jar, add all three oils into the jar and use the microwave to heat it for about a minute. After, check the temperature of your mixture and ensure that it is around 120°. Your lye solution should also have cooled down to 120°. Allow both jars to cool until somewhere between 95° and 105°.
Step 3
Once at the right temperatures, add the oil mixture into a mixing bowl and add the lye solution slowly. Stir for around 5 minutes until all is combined. After, you can continue stirring or use an immersion blender until the soap mixture thickens and lightens in colour. Your signal should be when the texture starts looking like pudding.
Step 4
Add in all your essential oils, herbs and other additional ingredients. Stir again to combine, and pour the mixtures into the moulds. Cover up with plastic wrap and wrap it up with an old towel. This will start the process of Saponification. Let it rest for 24 hours.
Step 5
After a day, check in on your soap and if it is still soft and warm, let it sit for another 12 to 24 hours. Once it turns cold and firm, remove it from the moulds and onto some parchment paper. For best results, cure your DIY bath soaps for up to 4 weeks. Turning it over each week so all sides are exposed to the air. Use a baking rack or DIY baking rack for more convenience.
Step 6
Once your DIY bath soaps are fully cured, use wax paper to wrap them up and store them in an airtight container. This is because DIY handmade soaps actually create their own glycerin, a humectant that pulls moisture from the air. Wrapping it up also prevents it from attracting debris and dust.
The Final Verdict
See? It’s not that hard to DIY your own body wash, afterall. It’s all fun and games. One soap can last up to 2-3 days depending how frequent you use them. And once it runs out, you can pop another bar that’s been cool off in the freezer. How frequent? Now you don’t have to run out to the store every time your soap runs out.
If you do try out this little DIY project of making your own bath soap, do tag and let us know on our Instagram and Facebook! Follow for more beauty trends and the latest news!